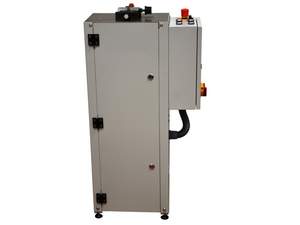
KRME broaching machine for notch impact tests
German quality at the best price
Save yourself the time-consuming task of aligning the notch impact tests on your milling machine: with this machine, insertion and initial clearing takes just 3 seconds and you don't have to pay attention to the milling angle or milling depth!
Video Notch Broaching Machine KRME for notch impact test specimens
Notches without set-up time
Insert sample, clamp, start: 3 seconds
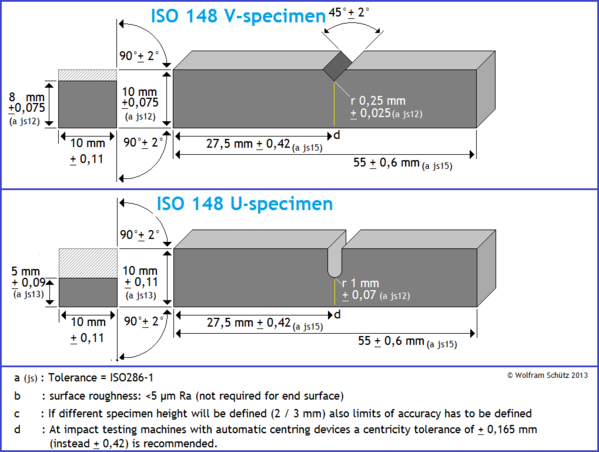
The key advantage is that there is no need for time-consuming, precise alignment of the notched bar impact test prior to machining. The notching machine is always ready to start without the need for time-consuming specimen positioning. This makes notching as quick and easy as the impact test itself. The national and international standards for impact testing to ISO148 / ASTM E23 describe not only the impact test but also the requirements for the impact test specimens. These must be manufactured to tight tolerances (see drawing below). The production of the square 10 x 10 x 55 mm specimen is the simplest production step. Making the notch within the tight tolerances is much more critical.
This is because the results of the impact test can only be as accurate as the quality of the specimen will allow; an inaccurately machined specimen will inevitably lead to erroneous results. The contours of the specimen can be produced using normal machining techniques. However, attention must be paid to the quality of the surface: The contact surfaces of the specimen are pulled along the edges of the abutment with high compressive force. If these contact surfaces are too rough, this can affect the result. In addition, rough surfaces will wear these critical edges of the abutment more quickly. The notch must be made within the tolerances shown on the drawing. The notch must be made according to the following requirements:
- Exact notch depth or sample width 8+0.075mm
- Notch centre (very important for laterally acting centring)
- Notch direction to the sample axis
- Notch rotation
- Notch radius (tool wear for milling cutters)
- Compliance with surface roughness
Notch insertion in seconds thanks to broaching technology
No alignment work: insert, clamp, start - <30 for sample with maximum accuracy
If a milling machine is not permanently reserved for the production of impact test specimens (100% utilisation exclusively for impact test specimens), the problem begins: the specimen must be positioned extremely accurately each time and clamping must be carried out with extreme precision: 10 minutes have quickly passed without machining having begun. With the notch broaching machine described here, a notch is produced much faster and therefore more cost-effectively. In addition, the accuracy of the notch is usually higher. Particularly where there is no need to produce hundreds of samples (which are then processed in batches on a milling machine), the notch broaching machine is THE alternative. It is particularly popular with materials testing service providers, where cost effective yet accurate specimen production is of paramount importance. With the KRME, notches can be made by anyone (without prior machining knowledge) in industrial and materials laboratories. Suitable specimens for educational purposes at universities, colleges and vocational schools can also be produced very cost-effectively from, for example, standard 10 x 10 mm square material.
Trick: It is not the depth of the notch that matters, but the remaining 8 mm.
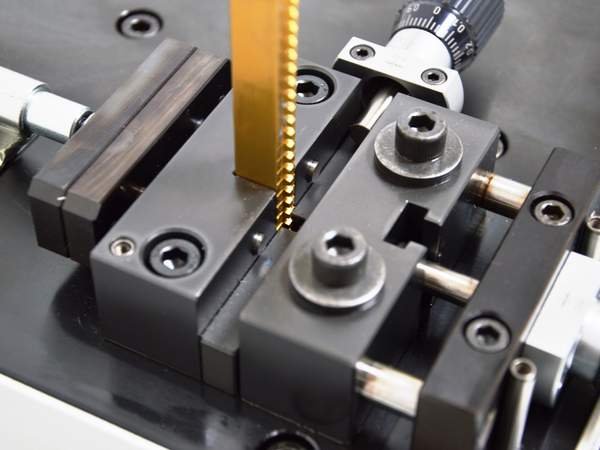
With the notch broaching machine shown here, the effort is reduced to a minimum as the notch to be introduced is essentially independent of the specimen thickness. The machine uses a gauge block to set the distance to the broach so that the remaining specimen cross section is exactly to the standard. Why is this machine so effective?
DThe principle of operation is such that the reference size for the notch base is always 8 mm (V-notch 2 mm). Even if the specimen is 9.5 mm thick (undersize / manufacturing tolerances), 8.0 mm will always remain in the notch base. The distance from the base of the notch to the point where the specimen is placed on the specimen holder is therefore precisely set. The broach will always have the correct distance to this wall regardless of the specimen size.
No adjustment is required for exact notch insertion (notch depth)! Insert specimen, close quick clamp, start
Machine Specifications
| Machine type | KRME 2 - 240 (Electric notch broaching machine with broach 240 mm) |
| Number of samples approximate | 80 pieces / hour |
| Max. hardness for broaching | < 40 HRC (no higher hardness, as broach teeth are damaged / wear out / break off) |
| Dimensions width / depth / height approximate | 50 / 31 / 105 cm broach at the bottom / 1,290 at the top |
| Space requirement approximate | 80 / 60 / 1.40 cm |
| Weight | ca. 90 kg |
| Motor with frequency converter | 0.55kW/2,84A - 3,450 rpm, 120 strokes/hour - Adjustable speed depending of material |
| Standard power connection / Option | 220V/50Hz / 1 phase / 1.5 A / 220V plug / other on request |
Specimen dimensions / Impact specimen dimensions according to ISO 148 + ASTM E23
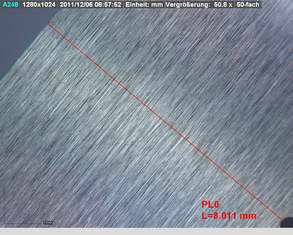
Need to check and document the dimensions of your impact specimens?
Then this USB-Mikroskop is the solution to your needs.
Extract from comparative tests SIEMENS AG
KWU - Kraft Werks Union - Comparative analysis of milled / cleared ISO-V samples
"The results of the notched bar impact bending tests on specimens with a broached notch (notch impact energy, toothed fracture percentage and the characteristic values of the instrumented test) are in good agreement with the results of the specimens with a milled notch. Notch broaching machines are well suited for the production of standardised notches on ISO-V specimens".
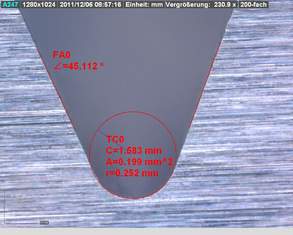
| SIEMENS AG | Notch radius | Notch Angle | Width | Remark | |
Test-No |
| 0,25 +/- 0,025 | 45° +/- 2° | 8,0 mm +/- 0,075 | |
1 | + | + | 8,00 | within tolerance | |
2 | + | + | 8,01 | within tolerance | |
3 | + | + | 8,02 | within tolerance | |
4 | + | + | 8,01 | within tolerance | |
5 | + | + | 7,99 | within tolerance | |
6 | + | + | 8,01 | within tolerance | |
7 | + | + | 8,02 | within tolerance | |
8 | + | + | 8,01 | within tolerancez | |
9 | + | + | 8,02 | within tolerance | |
Number of broaching until sharpening / replacement
High-strength alloys (high notched impact strength) require the use of titanium-coated broaches. The service lives specified below for broaches are approximate guide values, as the steel grades sometimes vary greatly depending on the alloy components. The service lives cannot be guaranteed.
The material hardness should not exceed 40 HRC. At this hardness, a titanium coating on the broach is strongly recommended. Despite this coating, with this high hardness it must be expected that the service life (sharpness) will only allow a small number of broaching operations before resharpening.
Broaches are wearing parts. A warranty for these is generally excluded, as we cannot prevent incorrect operation: After EVERY broaching operation, the broaching tool must be thoroughly cleaned of chips (brass brush), as any chips remaining in the broaching tool will cause the broaching teeth to break (non-repairable tool).
| Sample material | Tensile Strength | Samples standard broach | Outil de brochage revêtu de titane TIN |
| ST52-3 N | 490 - 630 | 6.500 | 10.000 |
| 42 CrMo4 V | 750 - 860 | 4.000 | 6.500 |
| 34 CrNiMo 6V | 1.000 1.400 | 3.000 | 5.000 |
| VA (18/10) | 700 1.300 | xxx | 4.000 |
| 1.4548 | 1.200 | xxx | 2.000 |
| 1.3901 (24-28% Ni) |
| xxx | 1.500 |
| 1.4986 WK | 650 - 850 | xxx | 1.000 |
| Titanium |
| xxx | 500 |
| Plastic |
| Not necessary | Not necessary |


